How I built a Lip-synced character in Rive
I wanted to see how far you can push character animation in Rive, specifically lip sync. Apps like Duolingo use talking characters to make learning feel alive. I decided to explore what it takes to build something similar from scratch.
The character
I started with Midjourney iterating on the look until I had a reference worth building from. From there I rebuilt everything from scratch as a clean vector in Rive, keeping the original feel but making it fully animatable. The most important part was the mouth. First I rigged it using bones and tested a few approaches before finally settling on the method that gave the most control. On top of the lip sync, the character has a subtle fake 3D parallax on the head, a small thing that makes her feel alive even when she's not speaking.
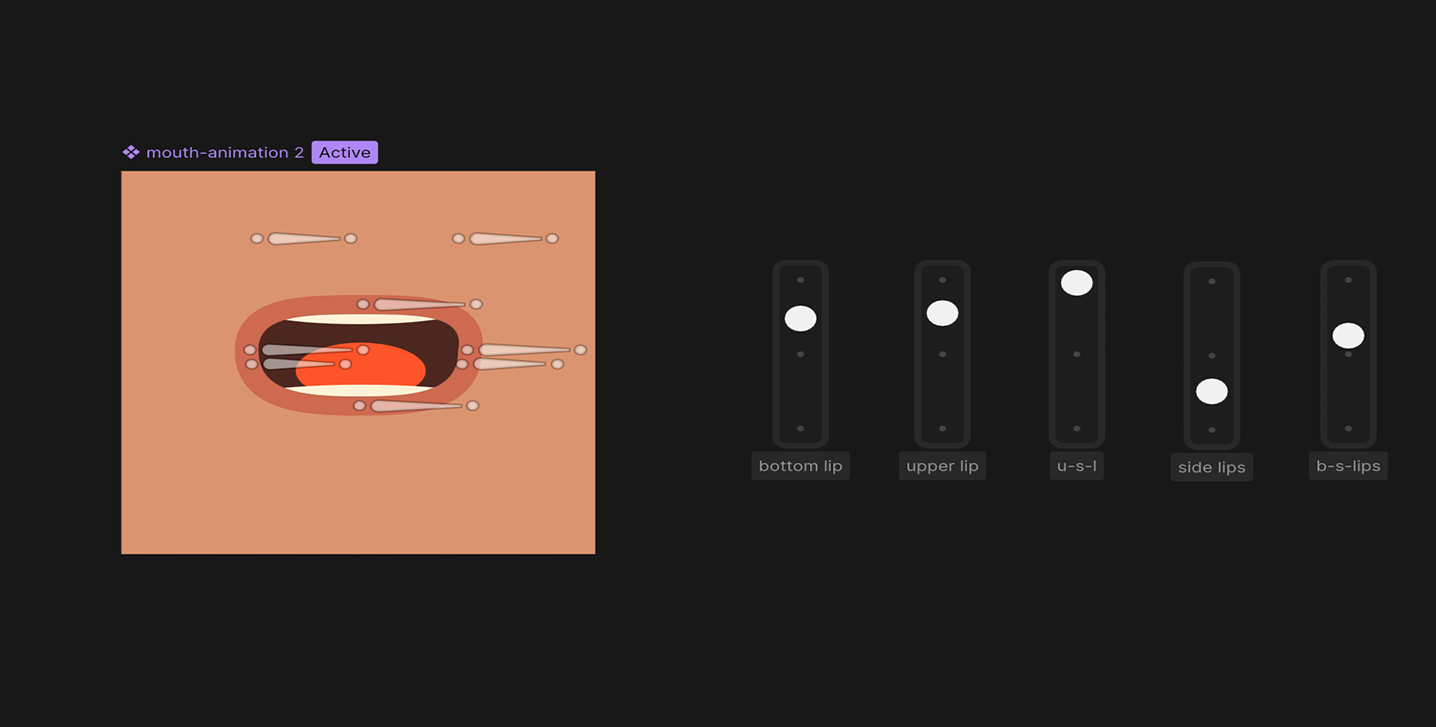
Ten mouth shapes
Spoken English can be broken down into roughly ten distinct mouth positions, called visemes. I prepared ten animations in Rive, one per viseme. Each viseme covers a group of phonetically similar sounds:
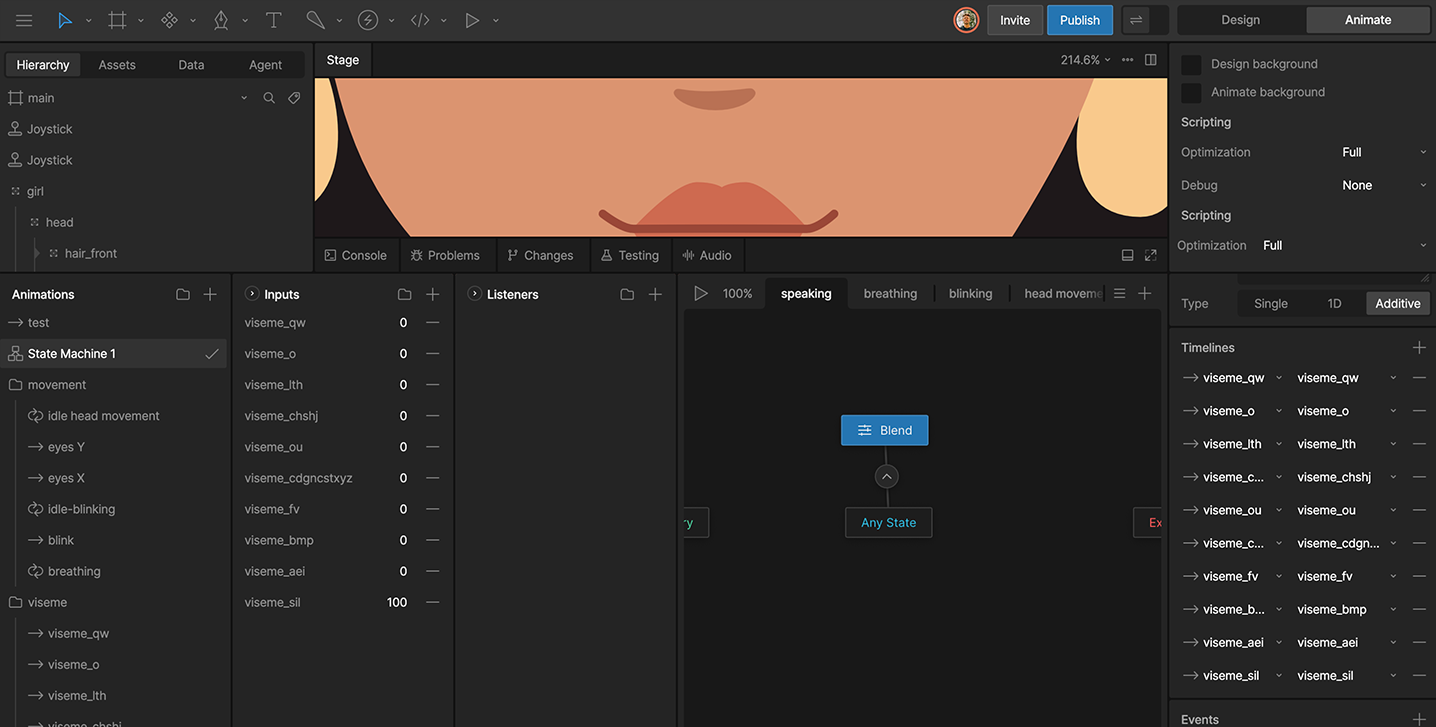
The state machine
Driving mouth movement with keyframes per phrase would be impractical. Instead, I built a state machine with a single number input called phoneme. Each of the ten states is triggered when phoneme equals its corresponding value. This way, the mouth can be controlled entirely from JavaScript at runtime. No timeline scrubbing, no manual keyframes per phrase.
The problem
When I started working on the lip sync character, the animation side was clear - ten viseme states in Rive, one state machine, one number input. What wasn't clear was how to get the timing data. Speech synthesis APIs return audio. That's it. To sync mouth shapes to that audio, you need to know which sound is spoken at which exact millisecond. Doing this manually, listening, measuring, writing JSON, is tedious and doesn't scale past one or two phrases. I needed a tool.
Designing it first
Before writing any code, I opened Figma and designed the interface. I wanted it to be simple: paste in your credentials and text, hit generate, get usable output immediately. The output had two parts: a visual timeline of phoneme chips (so you can see what was detected), and a ready-to-copy JavaScript snippet for Rive.
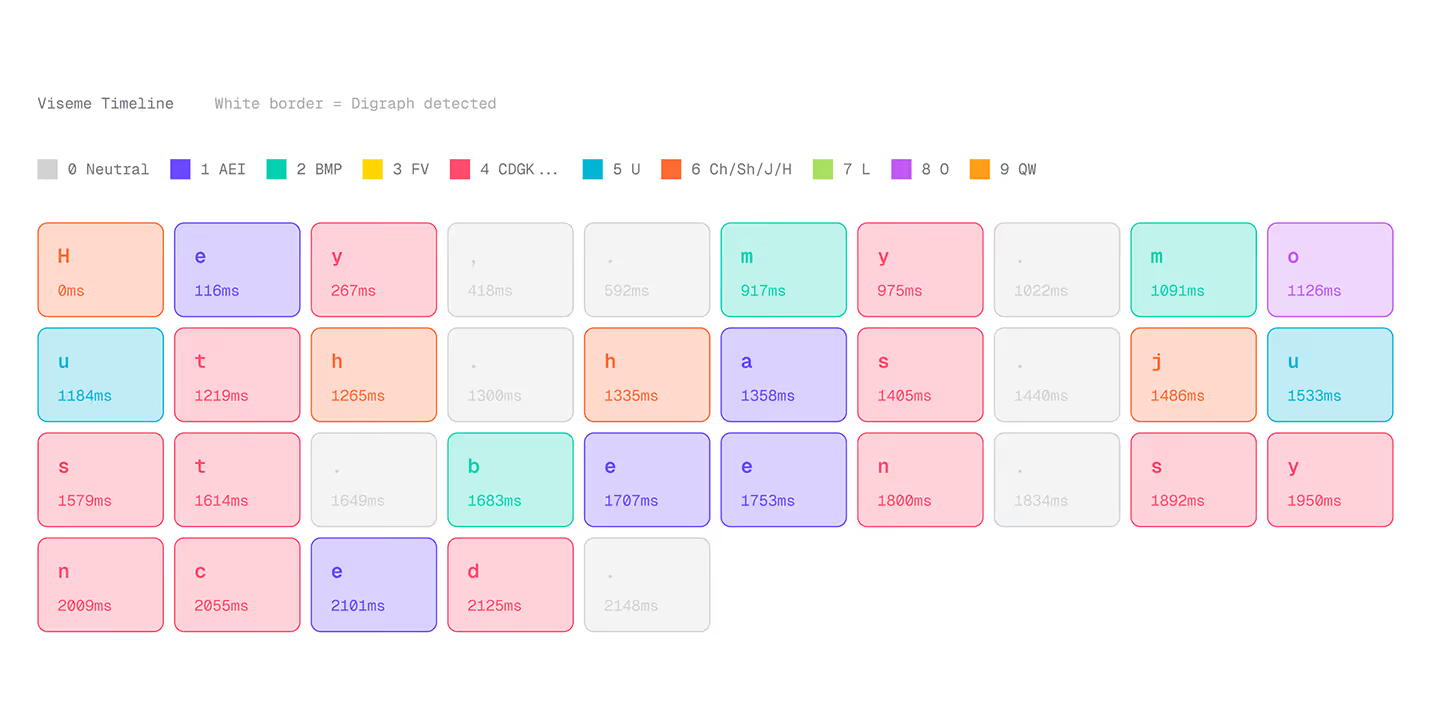
How it works
The tool uses ElevenLabs' end point, a lesser-known API call that returns not just the audio, but the start time of every character in the synthesized speech. From there, each character gets mapped to one of ten viseme values. Digraphs like Ch and Sh are handled as pairs. Consecutive identical visemes are deduplicated to keep the output clean.
The result is a millisecond-accurate array like this:
[
  { "chars": "H", "viseme": 6, "timeMs": 0 },
  { "chars": "e", "viseme": 1, "timeMs": 58 },
  { "chars": "ll", "viseme": 7, "timeMs": 112 }
]
Plus a JavaScript snippet ready to paste into your Rive project.
What you need to use it
1. An ElevenLabs account - the free tier works, but has limited characters per month.
2. An ElevenLabs API key - generated in your account settings.
3. A Voice ID - found in the ElevenLabs voice library.
2. An ElevenLabs API key - generated in your account settings.
3. A Voice ID - found in the ElevenLabs voice library.
What it outputs
1. MP3 audio playback - you can preview the generated voice directly in the tool.
2. Viseme chips - a color-coded visual of every phoneme and its timestamp.
3. JavaScript snippet - paste directly into your Rive project.
4. Raw JSON - if you want to use the timing data in your own way.
2. Viseme chips - a color-coded visual of every phoneme and its timestamp.
3. JavaScript snippet - paste directly into your Rive project.
4. Raw JSON - if you want to use the timing data in your own way.
The tool is free and available at rive.expert/tools/lip-sync-timing-generator.
It also lives at lipsynctiming.netlify.app.
It also lives at lipsynctiming.netlify.app.
Connecting speech to animation
After I built a small web tool that takes synthesized speech, extracts character-level timestamps, maps them to viseme values, and outputs a millisecond-accurate JSON array, the JavaScript side is straightforward: iterate over the timing array and fire a setTimeout for each viseme event.
visemeTimeline.forEach(({ viseme, timeMs }) => {
  setTimeout(() => { phoneme.value = viseme; }, timeMs);
});
The result
The character responds to three different dialogue lines, each with accurate mouth sync and word-by-word subtitles.
You can try it at the top of this article, or at lipsync-animation.netlify.app.
You can try it at the top of this article, or at lipsync-animation.netlify.app.
The timing tool is free to use at rive.expert/tools/lip-sync-timing-generator.